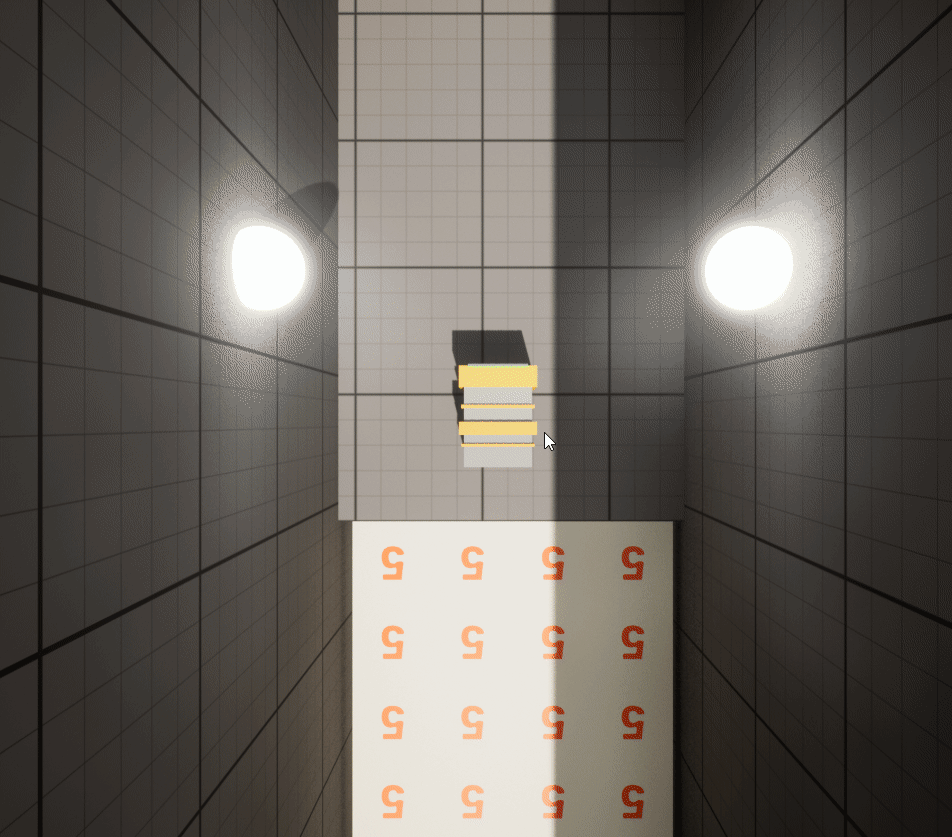
Take on challenging platforming stages as you try to escape a deadly lab. Playing as a small robot you need to charge your movement so you can dash over gaps and reach freedom. This game was created between February-May 2023 for my second year on the Games Technology Course at the University of the Creative Arts Farnham. This was a solo project, with everything in the game being created by me. Created in Unreal Engine using the C++ Language.
This game was my second time programming a game in Unreal Engine using the C++ language. Similarly to my first time working with the language in the Engine, I also used blueprints where needed, however the majority of the game was created via programming. During my time working on this project I found my skills at both Unreal Engine and the C++ language improved, managing to form an understanding with the language I didn’t have before. After all this I managed to create a game programmed with code I was proud of. Below you can see several snippets of my favourite bits of code that I made for the game, and can see the full scripts by visiting my GitHub.
Player Movement
This project was my first time programming the movement of the player within the Unreal Engine. In previous projects I had always made the player move via the default character controller blueprints created by the Engine. This time, rather then just using the code provided by the engine, I copied that same code over to a new Actor, and reworked it to fit the mechanics of my game. This basically led to me examining the different functions of the script, trying to figure out how they all fitted together – much like when taking a machine apart to gain a better understanding of it – and by doing this I managed to gain a much greater understanding of C++ in Unreal, figuring out what I needed for my player’s intended control and what I needed to program to get there. This was all mainly done in a C++ class named “Player_Character”.
Programming the Dash
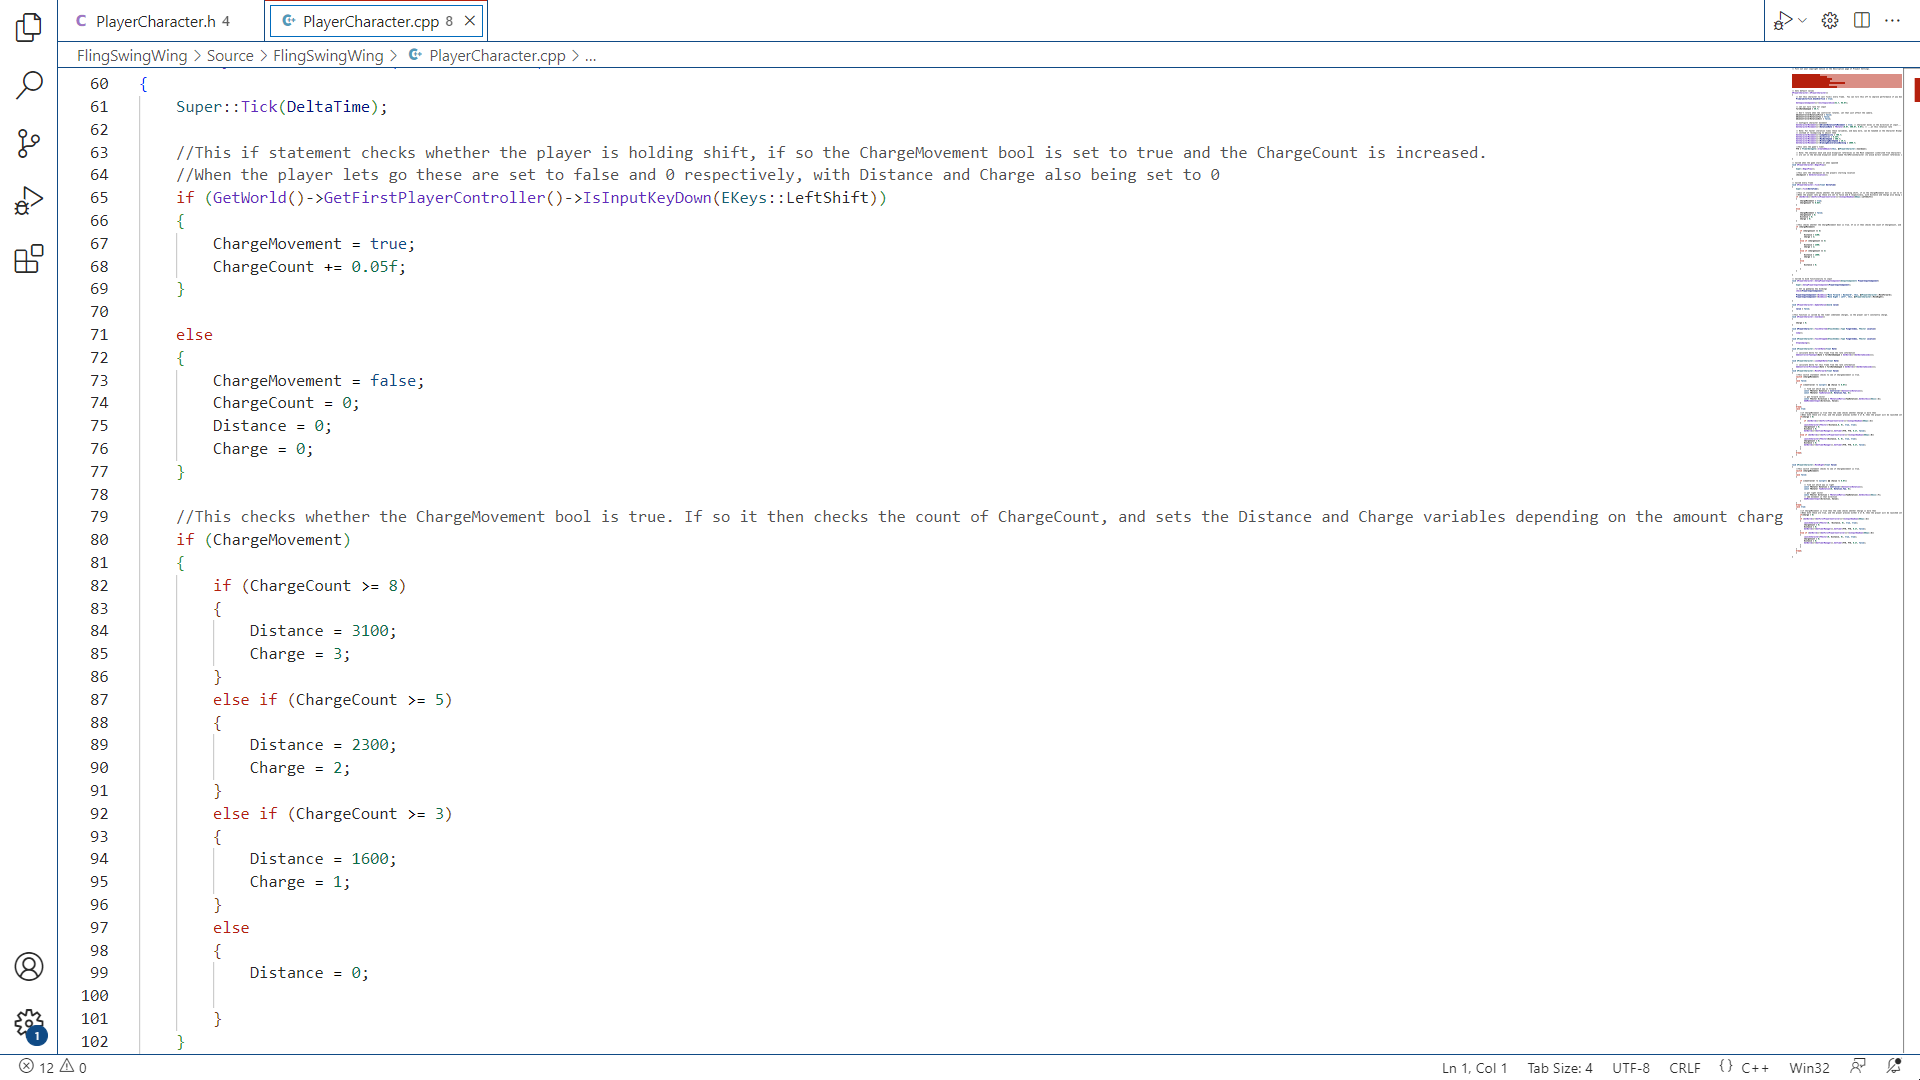
void APlayerCharacter::Tick(float DeltaTime)
{
	Super::Tick(DeltaTime);

	//This if statement checks whether the player is holding shift, if so the ChargeMovement bool is set to true and the ChargeCount is increased.
	//When the player lets go these are set to false and 0 respectively, with Distance and Charge also being set to 0
	if (GetWorld()->GetFirstPlayerController()->IsInputKeyDown(EKeys::LeftShift))
	{
		ChargeMovement = true;
		ChargeCount += 0.05f;
	}

	else
	{
		ChargeMovement = false;
		ChargeCount = 0;
		Distance = 0;
		Charge = 0;
	}

	//This checks whether the ChargeMovement bool is true. If so it then checks the count of ChargeCount, and sets the Distance and Charge variables depending on the amount charged.
	if (ChargeMovement)
	{
		if (ChargeCount >= 8)
		{
			Distance = 3100;
			Charge = 3;
		}
		else if (ChargeCount >= 5)
		{
			Distance = 2300;
			Charge = 2;
		}
		else if (ChargeCount >= 3)
		{
			Distance = 1600;
			Charge = 1;
		}
		else
		{
			Distance = 0;

		}
	}

}
Since the majority of the player’s movement was derived of the initial Character Controller script, I felt it more useful to show the parts of the script written by me, specifically how the script was written to allow the player to charge there movement. This main part of the movement was written within the script’s tick function. In here the game checks whether the player is holding down the shift key. If so, then the players movement freezes, setting a bool called “ChargeMovement” as true and the float “ChargeCount” begins increasing, which stores how long the player has been charging there movement for. This charging is interrupted if the player lets go of the button, resetting all the variables. If the player is holding the shift key, then the game checks the value of “ChargeCount”, and increases the value of an int named “Distance” accordingly, with the longer the key is held for resulting in the higher the value. The rest of the calculations for the dash are found in the MoveFoward() and MoveRight() functions.
void APlayerCharacter::MoveForward(float Value)
{
	//This switch statement checks to see if Chargemovement is true.
	switch (ChargeMovement)
	{
	case false:
	{
		if ((Controller != nullptr) && (Value != 0.0f))
		{
			// find out which way is forward
			const FRotator Rotation = Controller->GetControlRotation();
			const FRotator YawRotation(0, Rotation.Yaw, 0);

			// get forward vector
			const FVector Direction = FRotationMatrix(YawRotation).GetUnitAxis(EAxis::X);
			AddMovementInput(Direction, Value);
		}
	}
	break;
	case true:
	{
		//if ChargeMovement is true then the code checks whether Charge is more then
		//When both these are true, and the player presses either S or W, then the player will be launched into the given direction, before the game calls the Cooldown.
		if(Charge > 0)
		{
			if (GetWorld()->GetFirstPlayerController()->IsInputKeyDown(EKeys::S))
		{
			LaunchCharacter(FVector(-Distance,0, 0), true, true);
			ChargeCount = 0;
			Distance = 0;
			GetWorld()->GetTimerManager().SetTimer(FTH, FTD, 0.2f, false);
		}
		else if (GetWorld()->GetFirstPlayerController()->IsInputKeyDown(EKeys::W))
		{
			LaunchCharacter(FVector(Distance, 0, 0), true, true);
			ChargeCount = 0;
			Distance = 0;
			GetWorld()->GetTimerManager().SetTimer(FTH, FTD, 0.2f, false);
		}
		}
	}
	break;
	}
}
The MoveFoward() and MoveRight() functions perform the same things, just designed to move the player in the Z axis or X axis respectively. The functions involve one switch statement, which checks the value of the ChargeMovement bool. If the bool is false, then the player can move around like normal, but if it’s true, then the player is storing there charge. When ChargeMovement is true the game waits to see whether the player presses any of the directional buttons, which when done launches the player in the direction of that they inputted, before starting a Timer to delay the player before next storing charge.
Miscellaneous Classes
Throughout the development of this game I found myself creating several different C++ classes to be used in the game. Some of these were as simple as one function whilst others required more complex code. This section will show some of my favourite lines of code within the different classes, to give a taste of how these smaller scripts were programmed.
Damage and Checkpoints
void ARespawn::OnOverlapBegin(UPrimitiveComponent* OverlappedComponent, AActor* OtherActor, UPrimitiveComponent* OtherComp, int32 OtherBodyIndex, bool bFromSweep, const FHitResult& SweepResult)
{
	//Checks to see if the overlaping actor is the player character
	APlayerCharacter* Character = Cast<APlayerCharacter>(OtherActor);

	//If the overlapping character is the player character, then a switch statement is called, checking whether the SpawnorSave bool is true or false.
	if (Character)
	{
		switch (SpawnorSave)
		{
		case true:
		{
			//if SpawnorSave is true then the playercharacter script's checkpoint vector is replaced by the script's instance's Checkpoint vector.
			Character->checkpoint = Checkpoint;
		}
		break;

		case false:
		{
			//if SpawnorSvae is false then the player character gets moved back to their checkpoint location.
			Character->SetActorLocation(Character->checkpoint);
		}
		break;
		}
	}
}
The class “Respawn” was created to fulfil two purposes – those being to register the player at new checkpoints and to send the player back to their previous checkpoint when they’ve been damaged – with these elements both being programmed into one function. When the player overlaps with the collider of this classes instance, then the OnOverlapBegin function is called. Within here, it checks the value of a bool which can be set for each instance of the class in the Unreal Editor, named “SpawnorSave”. If the bool is true, then that means the instance will be setting a new checkpoint for the player, setting the value of the “checkpoint” Vector3 within the Player_Character to a new location. When the bool is set to false then the script moves the player over to the location stored in their “checkpoint” variable. Designing the class this way allowed me to easily drag instances of it throughout the stage with no hassle.
Destroyable Objects, Turrets and Bullets
void ADestroyableObject::OnOverlapBegin(UPrimitiveComponent* OverlappedComponent, AActor* OtherActor, UPrimitiveComponent* OtherComp, int32 OtherBodyIndex, bool bFromSweep, const FHitResult& SweepResult)
{
	//Checks to see if the overlaping actor is the player character
    APlayerCharacter* Character = Cast<APlayerCharacter>(OtherActor);

	//This first checks if the overlapping actor is the player character.
	//Then the code checks to see if the player character's charge is larger then the BreakCount int, if so then this object is destroyed.
    if (Character)
    {
		if(Character->Charge >= BreakCount)
		{
			Destroy();
		}
   }
}
When designing the level for this game I had the idea of there being obstacles that the player can destroy when charging into them. This was used for the glass at the start of the game, and the turrets later in the game. As such, I started by programming a simple class, named “DestroyableObject” which I could use to derive children from. This class is simple, with only one function. When the player collides with the object it will check if the value of the player’s “Charge” is higher then it’s own int “BreakCount”, if so, then the object will be destroyed. With this simple script created I began work on it’s child classes.
void ATurret::ShootBullet()
{

	//Checks to see if CanSpawn is false
	if (CanSpawn == false)
	{
		//This function starts by creating new varibles that contain the location and rotation of the Spawn variable
		auto SpawnLocation = Spawn->GetActorLocation();
		auto SpawnRotation = Spawn->GetActorRotation();
		//These then create a bullet instance under the SpawnBullet name.
		auto SpawnBullet = GetWorld()->SpawnActor<AActor>(Bullets, SpawnLocation, SpawnRotation);

		//The code then calls the instance created as SpawnBullet so that the bullets values can be edited.
		ABullet* BulletInstance = Cast<ABullet>(SpawnBullet);
		//First it edits the bullets direction and speed by calling the intances SetDirection() function
		BulletInstance->SetDirection(Direction, speedmodifier);

		//It then changes the material of the bullet
		BulletInstance->ObjectMesh->SetMaterial(0, BulletMaterial);

		//After changing these elements the value of BulletInstance is set to null.
		BulletInstance = NULL;
	}
}
The most important child derived from the DestroyableObject class is that of the “Turret” class. The purpose of this class is simple: to spawn Bullets that the player must avoid. The class only has one function, named “ShootBullet()”. As the name implies, it is in here that the bullets are shot. The class will first check whether it’s able to spawn, by checking the “CanSpawn” bool. If it can then it will create an instance of the “Bullets” class, spawning it at the position of an invisible object named “Spawn”. Once the instance is created, it will set the material of the bullet in addition to the speed and direction of it. Once the bullet is set into the world then it sets the scripts “BulletInstance” variable to be Null. This class was designed to be derived into a blueprint child, where I used the features of the blueprint to customise the variables values with ease.
void ABullet::OnOverlapBegin(UPrimitiveComponent* OverlappedComponent, AActor* OtherActor, UPrimitiveComponent* OtherComp, int32 OtherBodyIndex, bool bFromSweep, const FHitResult& SweepResult)
{
	//Checks to see if the overlaping actor is the player character
	APlayerCharacter* Character = Cast<APlayerCharacter>(OtherActor);
	if (Character)
	{
		//If it is the player character then the code causes the player to go back to checkpoint and destroys the bullet instance.
		Character->SetActorLocation(Character->checkpoint);
		Destroy();
	}

	//Checks to see if the overlaping actor is a DestroyBullet script
	ADestroyBullet* DB = Cast<ADestroyBullet>(OtherActor);
	if (DB)
	{
		//if so then the instance of the bullet is destroyed.
		Destroy();
	}
}

void ABullet::Moving(float DeltaTime)
{
	//Every frame the code gets the current location and adds to it by the bullet velocity.
	FVector CurrentLocation = GetActorLocation();
	CurrentLocation = CurrentLocation + (BulletVelocity * DeltaTime);
	SetActorLocation(CurrentLocation);
}


void ABullet::SetDirection(int GoDirection, float SModifier)
{
	//This function uses a switch statement that checks the value of GoDirection
	switch (GoDirection)
	{
	case 0:
	{
		//Down
		BulletVelocity = FVector((100 * SModifier), 0, 0);
	}
	break;
	case 1:
	{
		//Left
		BulletVelocity = FVector(0, (100 * SModifier), 0);
	}
	break;
	case 2:
	{
		//Right
		BulletVelocity = FVector(0, (-100 * SModifier), 0);
	}
	break;
	case 3:
	{
		//Up
		BulletVelocity = FVector((-100 * SModifier), 0, 0);
	}
	break;
	}

}
Finally, we look at the script used to design the Bullets class that the Turret spawns. This script has several different important functions. Firstly, it has the OnOverlapBegin function, where it checks whether it is being overlapped by the player or by the class “DestroyBullet”. If it is overlapping the player, then it will take that player back to there last checkpoint, if it is overlapping with the DestroyBullet class then it will Destroy itself.
The next function of importance is the “Moving” function, which is called within the class’s Tick(). This function will work to move the Bullet in whatever direction it was set at when spawned. This direction is set using the final of the important functions, that of “SetDirection”, which is called by the Turret class when it sets the values of the bullet. This function checks the value of the “GoDirection” int, which is set when the Turret class calls the function, and uses that information to decide the direction of the bullet. It will set the value of the Vector3 variable (or FVector variable in Unreal) “BulletVelocity” to move in the direction listed in GoDirection, modifying that by the value of the Speed Modifier.

Bombs
void ABomb::Tick(float DeltaTime)
{
	Super::Tick(DeltaTime);

	//This will trigger the timer is StartBlowingUp is true, before setting StartBlowingUp as false
	if(StartBlowingUp == true)
	{
		StartBlowingUp = false;
		GetGameInstance()->TimerManager->SetTimer(TimerHandle, this, &ABomb::BlowUp, BlowUpTime, true);
	}
}

void ABomb::BlowUp()
{
	//If the playercharacter script has been assigned to the MyChild variable then this code will happen.
	if(MyChild != nullptr)
	{
		//If the player is in the collision during the point of explosion they will respawn at checkpoint.
		if(DangerZone == true)
		{
			MyChild->SetActorLocation(MyChild->checkpoint);
		}
	}
	//The blownup bool is set to true so that the bombspawn can remove the instance of the bomb
	blownup = true;
	//this destroys the instance of the bomb
	Destroy();
}

void ABomb::OnOverlapBegin(UPrimitiveComponent* OverlappedComponent, AActor* OtherActor, UPrimitiveComponent* OtherComp, int32 OtherBodyIndex, bool bFromSweep, const FHitResult& SweepResult)
{
	//This checks if it is colliding with the player
    APlayerCharacter* Character = Cast<APlayerCharacter>(OtherActor);
    if (Character)
    {
		//If the player has entered the collision then DangerZone is set to true, and the character is stored in the MyChild variable
		DangerZone = true;
		MyChild = Character;
   	}
}

void ABomb::OnOverlapEnd(UPrimitiveComponent* OverlappedComp, AActor* OtherActor, UPrimitiveComponent* OtherComp, int32 OtherBodyIndex)
{

	//This checks if the player character has exited the collision, and if so DangerZone is set to false.
	APlayerCharacter* Character = Cast<APlayerCharacter>(OtherActor);
    if (Character)
	{
		DangerZone = false;
	}
}
One of the final obstacles found in the game are the bombs which will hurt the player if they are in the blast radius upon blowing up. These obstacles are programmed in a class named “Bomb”, which uses several functions to create the explosive effect. Firstly, when the bomb is first spawned then the script begins a Timer, which when ending calls the “BlowUp()” function. The BlowUp() function checks whether the player is in the blast radius of the weapon, which it can tell by the value of the “DangerZone” variable. The bool DangerZone is set to true when the player overlaps with the class’s instance, and is set to false when the player stops overlapping. Therefore, that means the variable is only set to true when the player is within the blast radius. If the variable is true upon the calling of BlowUp() then the player is sent back to their last checkpoint and the bomb is destroyed, if not then the bomb will just destroy itself.

Timed Blocks
void ABreakableBlock::OnOverlapBegin(UPrimitiveComponent* OverlappedComponent, AActor* OtherActor, UPrimitiveComponent* OtherComp, int32 OtherBodyIndex, bool bFromSweep, const FHitResult& SweepResult)
{
	//This checks whether the player is the one to enter the trigger
    APlayerCharacter* Character = Cast<APlayerCharacter>(OtherActor);
    if (Character)
    {
		//If Triggered is false then the DeactivateBlock() function is called via a timer.
		if (Triggered == false)
		{
			Triggered = true;
			GetGameInstance()->TimerManager->SetTimer(TimerHandle, this, &ABreakableBlock::DeactivateBlock, BreakSpeed, true);
		}
   	}
}
void ABreakableBlock::DeactivateBlock()
{
	//The DeactivateBlock() function sets the Hidden bool as true and hides the actor, it also changes the collision type of the collision
	Hidden = true;
	SetActorHiddenInGame(true);
	ObjectMesh->SetCollisionProfileName("OverlapAllDynamic");
	//After this it sets a timer of 5 seconds to reactivate.
	GetGameInstance()->TimerManager->SetTimer(TimerHandle, this, &ABreakableBlock::ReactivateBlock, 5, true);
}

void ABreakableBlock::ReactivateBlock()
{
	//In ReactivateBlock() the Triggered and Hidden bool are set to false and the block reappears.
	Triggered = false;
	Hidden = false;
	SetActorHiddenInGame(false);
	ObjectMesh->SetCollisionProfileName("BlockAllDynamic");
}
The final obstacle programmed for this game are blocks, which despawn a few seconds after being stood on. These were created in a class called “BreakableBlock” and function thanks to a series of timers. The first of these timers is called when the player overlaps the block. The length of this timer can be set by each instance of the class, and store the time it takes before the block disappears. When the timer ends the function “DeactivateBlock() is called and the block is hidden from the game and given a new collision type so the player falls through it. The function then starts another timer of 5 seconds, which when completed calls the function “ReactivateBlock()”, which, as the name implies, sets it so the block appears in the game again, and the player can stand on it.