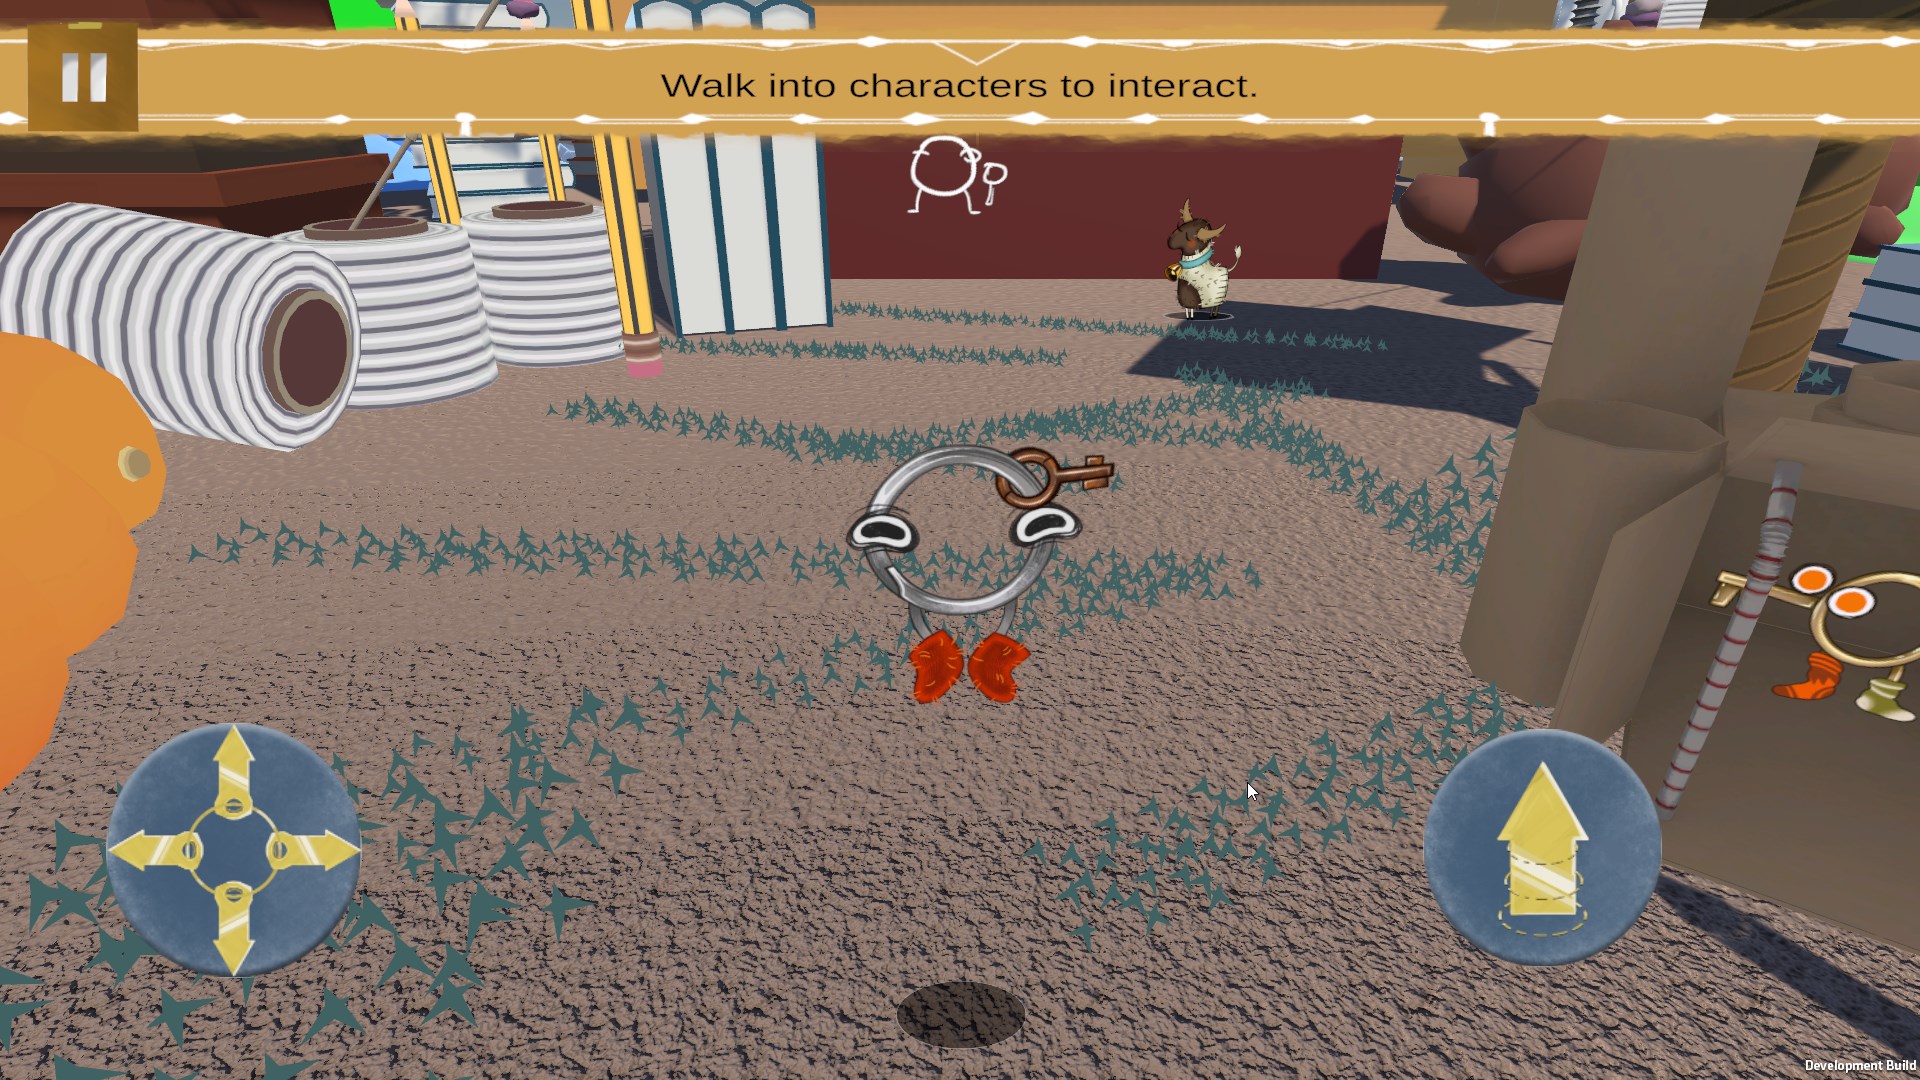
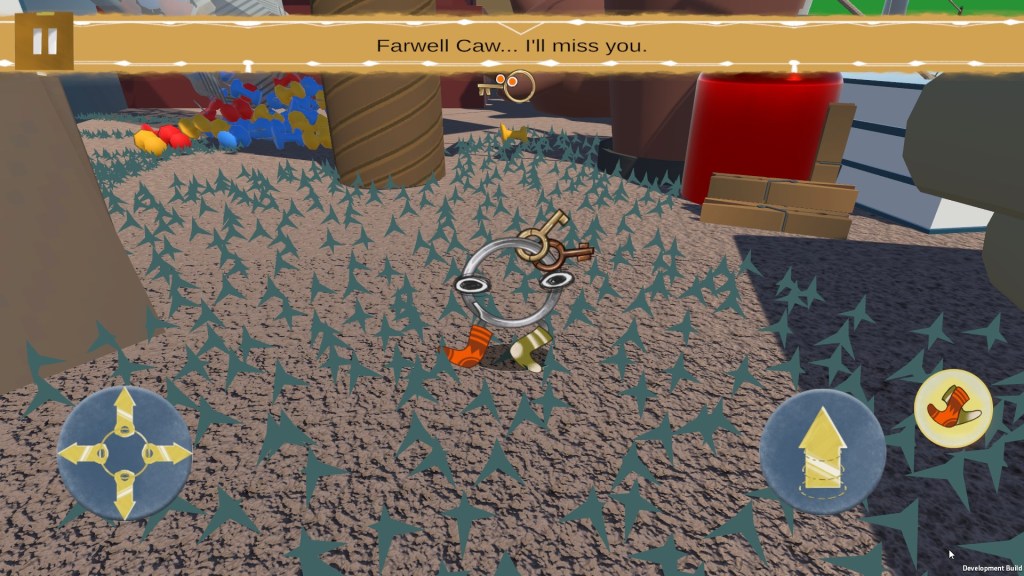
Experience a miniscule adventure as you explore a closet as a tiny keyring, trying to reach the top. Collect key’s along the way to gain new abilities to unlock new parts of the cupboard in this 3D platformer, which uses a mix of 2D and 3D visuals. This game was created between October 2022-January 2023 for the first term of my second year on the Games Technology Course at the University of the Creative Arts Farnham. This was created in a group, where I served as the game’s programmer and writer. Created in Unity 3D and the C# Language.
This project was my first time successfully making a 3D platformer, and as such was a big learning experience for me, as I not only learnt how to make 3D platformer movement but also learnt how to do this with 2D sprites in a 3D environment. The project brief for this game was to make a mobile game, so as such I also had to learn how to incorporate mobile touchscreen controls in Unity, which work well enough, but since the build only works on PC I also made sure the controls functioned using mouse and keyboard. Below you can see several pieces of code in C# that I programmed for this project, which can also be found on my GitHub.
Player Movement
This project, due to it being a 3D platformer, required satisfying movement controls which I needed to create in a way that felt satisfying to control for the player and allowed them to happily bounce around the game, which I believe I did a good job of developing. The player movement required I focus on creating a satisfying jump alongside it, which tied into the player’s animator, to keep the character expressive throughout the game, making this an interesting character to code.
Programming the Movement
 public class playmovement : MonoBehaviour

        void FixedUpdate()

        //Adds gravity to the object

            Myrigidbody.AddForce(Physics.gravity * Myrigidbody.mass, ForceMode.Acceleration);

        //Calls the movement
        if(StopMovement == false)
        {
            move();
        }

    void Update()

       if ((Myrigidbody.velocity.x != 0 || Myrigidbody.velocity.z != 0) && Myrigidbody.velocity.y == 0)
        {
            Legs.SetBool("Walking", true);
            SlowAnim.SetBool("Walking", true);
        }
        else
        {
            Legs.SetBool("Walking", false);
            SlowAnim.SetBool("Walking", false);
        }
As you’ll see with the jump programming, a lot of the movement script is called within a mix of the Update() and FixedUpdate() functions. Within the FixedUpdate() function the script starts by setting up the player’s gravity, making sure they are always effected by it at a fixed rate, hence it being called in the FixedUpdate(). Following this, the FixedUpdate() checks whether the player is able to move, and if so, it calls the move() function, which is used to set up the player’s movement. Meanwhile, the Update() function is used to check whether the player is moving. If so then the game swaps to the player’s movement animation, and once the player stops moving the animations stops and swaps back to it’s idle animation. The common trait for this script is that any calculations that effect movement are called in the FixedUpdate(), whilst any animation related lines of the code are called in the Update() function.
public class playmovement : MonoBehaviour

    private void move()
    {

        //This vector stores the movement information of the character, which then goes on to effect
        the characters rigidbody.
        moveValuesKeys = new Vector3();

        moveValuesKeys.z = movespeed * Input.GetAxis("Vertical") * Time.deltaTime;
        moveValuesKeys.x = movespeed * Input.GetAxis("Horizontal") * Time.deltaTime;
        moveValuesKeys.y = Myrigidbody.velocity.y;

        Vector2 UIInput = Playerinput.actions["Move"].ReadValue<Vector2>();
        Vector3 Move = new Vector3(UIInput.x, 0, UIInput.y);
        moveValuesUI.x = movespeed * Move.x * Time.deltaTime;
        moveValuesUI.z = movespeed * Move.z * Time.deltaTime;
        moveValuesUI.y = Myrigidbody.velocity.y;

        if(moveValuesKeys.x != 0f || moveValuesKeys.z != 0f)
        {
            Myrigidbody.velocity = moveValuesKeys;
        }

        if(moveValuesUI.x != 0f || moveValuesUI.z != 0f)
        {
            Myrigidbody.velocity = moveValuesUI;
        }
    }
The move() function which is called in FixedUpdate() is, as the name implies, the piece of code which sets up the player’s movements. Since the player is moved via their rigidbody, so as such we need to calculate the velocity of the rigidbody. There are two vectors which are used to calculate the movement of the player, the first being called moveValuesKeys. This vector calculates the movement of the player in the different axis, basing it off the input of the player in the horizontal and vertical axis given from the keyboard controls. Then, whatever value is stored is set to the player’s rigidbody’s velocity, but only if the x or z values of moveValuesKeys is not equal to 0. This is done as the second vector, MoveValuesUI, calculates the velocity of the player based off the input in the horizontal or vertical axis from the on screen touch-screen UI, with the script storing the input of the UI as a Playerinput variable. Due to this script being designed around two movement controls, the script checks to see which of the inputs is being used, by checking if the two Vectors X and Z values are not equal 0, which stops the velocity being set by an inactive input within the script.
Programming the Jump
public class playmovement : MonoBehaviour
void Update()
{
//The raycast used to check for the ground.
RaycastHit Ghit;
//The code which sets the groundbool if the player is on the ground.
groundbool = Physics.Raycast(transform.position, Vector3.down, out Ghit, raycastdistance,
ground);
//This if statement checks whether the player is pressing the jump button and is on the ground,
before allowing the player to jump
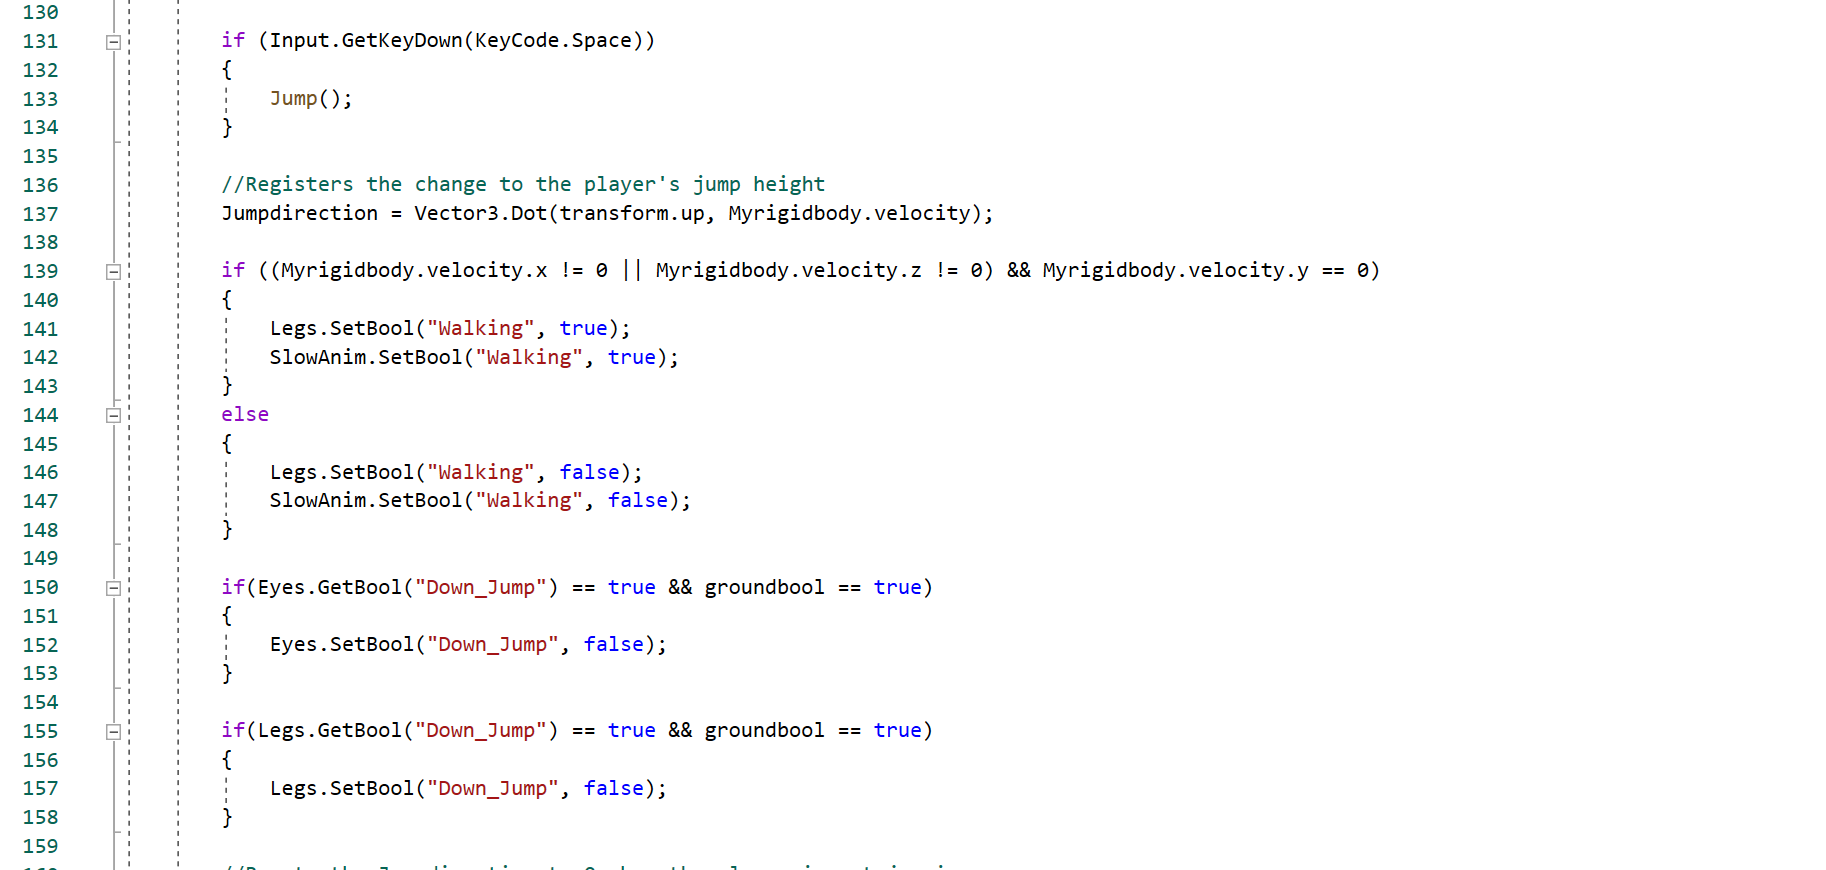
if (Input.GetKeyDown(KeyCode.Space))
{
Jump();
}
//Registers the change to the player's jump height
Jumpdirection = Vector3.Dot(transform.up, Myrigidbody.velocity);
if(Eyes.GetBool("Down_Jump") == true && groundbool == true)
{
Eyes.SetBool("Down_Jump", false);
}
if(Legs.GetBool("Down_Jump") == true && groundbool == true)
{
Legs.SetBool("Down_Jump", false);
}
//Resets the Jumpdirection to 0 when the player is not jumping
if(groundbool)
{
Jumpdirection = 0;
}
}
void FixedUpdate()
{
if(jump == true)
{
Myrigidbody.AddForce(Vector3.up * jumpheight, ForceMode.Acceleration);
jump = false;
Legs.SetBool("Jumping", true);
Legs.SetBool("Down_Jump", true);
Eyes.SetBool("Jumping", true);
Eyes.SetBool("Down_Jump", true);
jumped = true;
}
if(jumped == true)
{
//Once the player has reached the peak of there jump they will spend a bit still in the air
if (Jumpdirection < 0)
{
StartCoroutine(FloatJump());
}
}
}
Similarly to the movement programmed for the x and z axis within the script, the jump code, or the y-axis velocity, is programmed using code mixed between the Update() and FixedUpdate() functions, though unlike that part of the code, the Update() function is used for more then just the player’s animations. Whilst the Update() function does change the player’s animations based on the progress of their jump, the function is also important for several stages of the jumping process. At the beginning of the Update() function, a Raycast is set below the feet of the player, registering whether they are on the ground or not. If the player is on the ground then the bool groundbool is set to true. If the player presses space then the Jump() function is called, which, as you may assume, initiates the player’s jump. In addition, the Update function stores a float named Jumpdirection, which uses Vector3.Dot sum to calculate the change in the player’s height as they jump, which is used in calculations within the FixedUpdate(). The final thing that the Update() function does for the jump is set the value of Jumpdirection as 0 when the groundbool is true, so that it isn’t changing when the player is not jumping.
The fixed update is important for actually enacting the player’s jump. It starts by checking whether a bool named jump is true, which when true gives the players rigidbody a burst into the air, and sets a bool named jumped to true. This jumped bool, when true, then calls an if statement that tracks the value of Jumpdirection, setting so that if the variable reaches a value that is less then 0 then the FloatJump() function is called. This is done so that the code can tell when the player has reached the apex of there jump, as that is the point that Jumpdirection will swap to having negative values, as the change in the player’s height would be negative.

 public class playmovement : MonoBehaviour

    public void Jump()
    {
        if(groundbool)
        {
            if (StopJump == false && SlowJump == false)
            {
                jump = true;
            }
        }
    }

    IEnumerator FloatJump()
    {
        Myrigidbody.constraints = RigidbodyConstraints.FreezePositionY | RigidbodyConstraints.FreezeRotationX |
        RigidbodyConstraints.FreezeRotationZ | RigidbodyConstraints.FreezeRotationY;
        Legs.SetBool("Mid_Jump", true);
        Legs.SetBool("Jumping", false);
        jumped = false;
        yield return new WaitForSeconds(0.3f);
        Myrigidbody.constraints = RigidbodyConstraints.None | RigidbodyConstraints.FreezeRotationX |
        RigidbodyConstraints.FreezeRotationZ | RigidbodyConstraints.FreezeRotationY;
        Legs.SetBool("Mid_Jump", false);
        Eyes.SetBool("Jumping", false);
    }
The Jump() and FloatJump() functions are both used to process the player’s jump. The Jump() function has one simple purpose, after pressing space it checks whether the player is on the ground, and if so it checks whether they are able to jump. If both of these are true then the jump bool will be set to true, which as previously seen then ties into the FixedUpdate(). The FloatJump() function is also called from the FixedUpdate() when the Jumpdirection is less then 0, and pauses the player within the air, giving them some time before they fall back down. This is done by freezing the position the player is in the Y-axis for 0.3 seconds, before unfreezing there movement in this axis, causing them to fall after a few seconds break.
Programming the Shadow
public class Shadow : MonoBehaviour
{
    //A layermask which changes the things the raycast interacts with
    [SerializeField] private LayerMask ground;

    //The Shadow's position
    [SerializeField] private Transform ShadowTransform;


    // Update is called once per frame
    void Update()
    {
        RaycastHit Ghit;

        //This raycast is used to mark what's below the player and puts the shadow there
        Physics.Raycast(transform.position, Vector3.down, out Ghit, Mathf.Infinity, ground);
        ShadowTransform.position = Ghit.point + new Vector3(0, 0.1f, 0);

    }
}
Since the characters within this game are 2D sprites, it could be hard for the player to identify where they’re going to land. To counteract this issue I programmed in a shadow sprite, that of a black dot, which follows the player and shows where the player is going to land, making it much easier for player’s to plan their movements. This is done using a Raycast which is ca from beneath the player and stores the location of the ground beneath them, no matter how far this is from the player. Once the script has this value it then positions the shadow beneath the player to this point, giving the player an exact guide to where they will land.
Mechanics
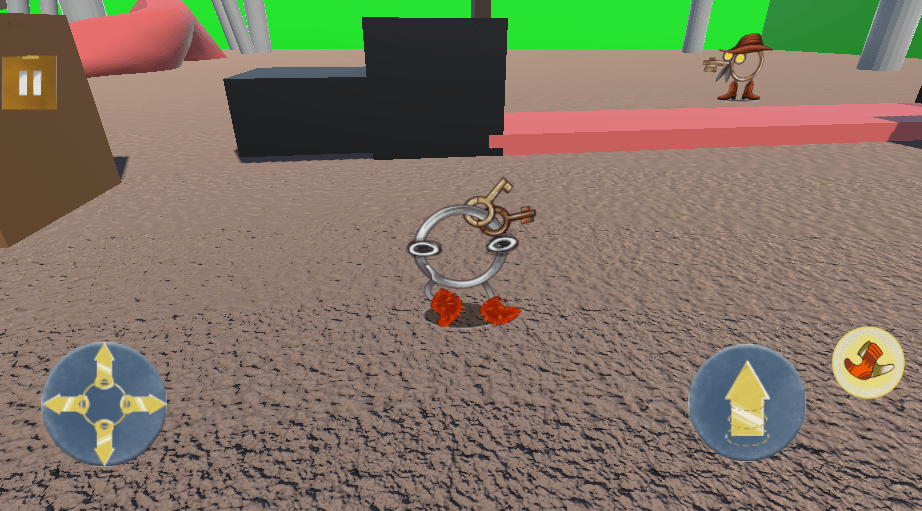
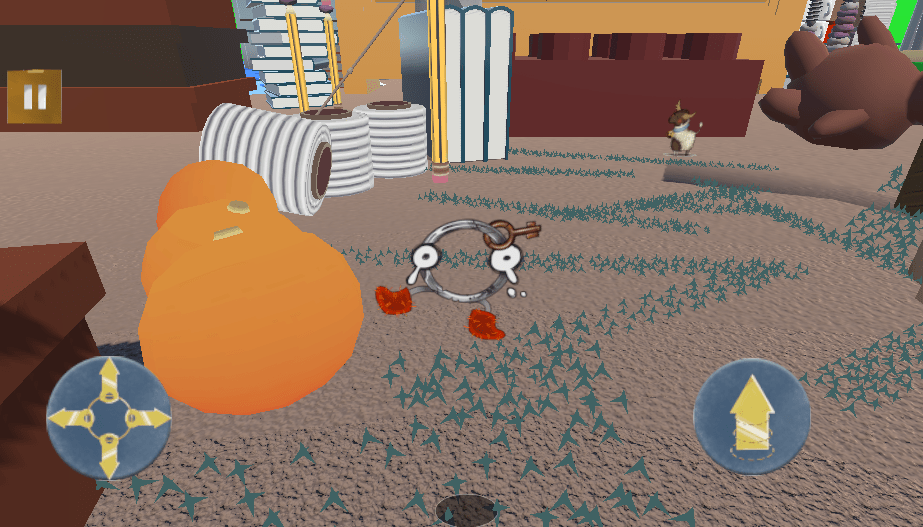
As the game progresses the player can unlock three different abilities which they can use on their platforming journey. In order of unlocking, these abilities are as follows: Ziplining, where the player can use ziplines to move across the stage; Safe-Walking, where the player can walk over spikes without dying, in exchange to half there movement speed and the inability to jump; Fire, the final ability gives the player a lighter that they can use to burn items, create paths and updrafts the player can use to reach new locations. Each of these abilities required some problem solving to get them working correctly, but ended up working well and creating a fun gameplay experience.
Ziplining
public class ZipStartTrigger : MonoBehaviour

{
    //Sets the mechanics script
    [SerializeField] public ZipLine_Code Z;

    //A Vector3 containing the position of the zipline, which will be set as the mechanics script's Zipposition upon
    collision
    [SerializeField]private Vector3 Zipposition;

    [SerializeField] private GameObject Player;

    [SerializeField] private GameObject ZipParent;


    // Start is called before the first frame update
    void Start()
    {
        Z = Player.GetComponent<ZipLine_Code>();
    }

    private void OnTriggerEnter(Collider other)
    {
        //If the player enters the script's trigger it will set the mechanics script's zipposition and set the Zipbool as
        true
        if (other.gameObject.tag == "Player")
        {
            Z.ZipPosition = Zipposition;
            Z.ZipParent = ZipParent;
            Z.ZipAnim = ZipParent.GetComponent<Animator>();
            Z.Zipbool = true;
        }
    }

    private void OnTriggerExit(Collider other)
    {
        //If you exit the script's trigger the zipbool will be made false and the mechanic script's zipposition will be
        set to default

        Z.Zipbool = false;
    }
}

public class ZipLineEnd : MonoBehaviour

{

    private void OnTriggerEnter(Collider other)
    {
        if (other.gameObject.tag == "Player")
        {
            other.GetComponent<ZipLine_Code>().ZipEnd = true;
        }
    }

}
The Zipline ability was definitely the ability I had the most issues with when programming it, as many of my solutions led to failure. However, the solution I decided upon was quite simple and worked effectively. In principle, when using a zipline, the player becomes parented to an invisible gameobject that is under the zipline. This parent gameobject is then animated to move down the zipline’s path, therefore moving the player with it. When at the end of the path the player then is unparented from the zipline, and can continue playing like normal. To get this working this mechanic required me programming several small scripts which all intertwine. This first script, under the name ZipStartTrigger, is used to register when the player enters the ziplines trigger. When the player enters this trigger, then several variables get set, being that of ZipPosition, ZipParent, ZipAnim and Zipbool. The first three variables are all needed to calculate the zipline movement, whilst Zipbool is just used to register that the player has interacted with the trigger, being set to false once the player leaves the trigger’s boundaries. Each of these variables is needed for the main hub for the Zipline’s script, called Zipline_Code. On the other end, the ZipLineEnd script has one purpose, checking when the player has entered it’s trigger and therefore reached the end of the zipline. When this happens, the script does it’s one job, setting the value of the ZipEnd bool to true, which starts the process of removing the player from the zipline.
public class ZipLine_Code : MonoBehaviour

{
    // Update is called once per frame
    void Update()
    {
        //This will check to see if the player is pressing the interaction button and whether they are next to a zipline
        if(ZipAnim != null)
        {
            if (Zipbool && Input.GetKeyDown(KeyCode.Space))
            {

                StopBoost = true;
                //Changes the players position to the ziplines
                MyTransform.position = ZipPosition;


                MyRigidbody.velocity = Vector3.zero;
                MyTransform.SetParent(ZipParent.transform);

                ZipAnim.SetBool("Start", true);

                //Freezes the player's Y position so they don't fall whilst using the Zipline
                MyRigidbody.constraints = RigidbodyConstraints.FreezePositionY | RigidbodyConstraints.FreezePositionX |
                RigidbodyConstraints.FreezePositionZ | RigidbodyConstraints.FreezeRotationZ |
                RigidbodyConstraints.FreezeRotationZ | RigidbodyConstraints.FreezeRotationY;
                PM.StopMovement = true;

                gameObject.layer = ZipLayer;

                Legs.SetBool("ZipLine", true);
                Hat.SetActive(true);
            }
            else if (ZipEnd == true)
            {
                StopBoost = false;
                ZipEnd = false;
                MyTransform.SetParent(null);

                gameObject.layer = RegularLayer;

                ZipAnim.SetBool("Start", false);
                //If the player lets go of the E button they will be able to fall again
                MyRigidbody.constraints = RigidbodyConstraints.None | RigidbodyConstraints.FreezeRotationX |
                RigidbodyConstraints.FreezeRotationZ | RigidbodyConstraints.FreezeRotationY;
                PM.StopMovement = false;
                Legs.SetBool("ZipLine", false);
                Hat.SetActive(false);
            }
        }
    }
}
The majority of the script for Zipline_Code is done within the Update() function. This function starts by checking whether the ZipAnim variable is null or not. ZipAnim – alongside ZipPosition and ZipParent – is automatically set to null if the player is not within the boundaries of a zipline, being set when the player enters the trigger of ZipStartTrigger. Anyway if the ZipAnim is not null and ZipBool is true whilst the player hits the Space key, then the Zipline begins. This is done when the zipline sets the player’s position to that stored in ZipPosition, and attatches them as a child to the object stored in ZipParent, freezing the players position in all axis so that the player can’t move. It then changes the player’s layer to one that can’t interact with any colliders outside of the zipline, so that they don’t get caught on any objects in the way. Once all this is done,the animation of ZipAnim is played and the player begins moving down the zipline. Once reaching the end of the zipline, with the bool ZipEnd being set to true, then the player is let off the zipline, being removed from the ZipParent and given the ability to move again, with all the variables set in ZipStartTrigger being nullified. This code works well and created a satisfying ziplining experience.
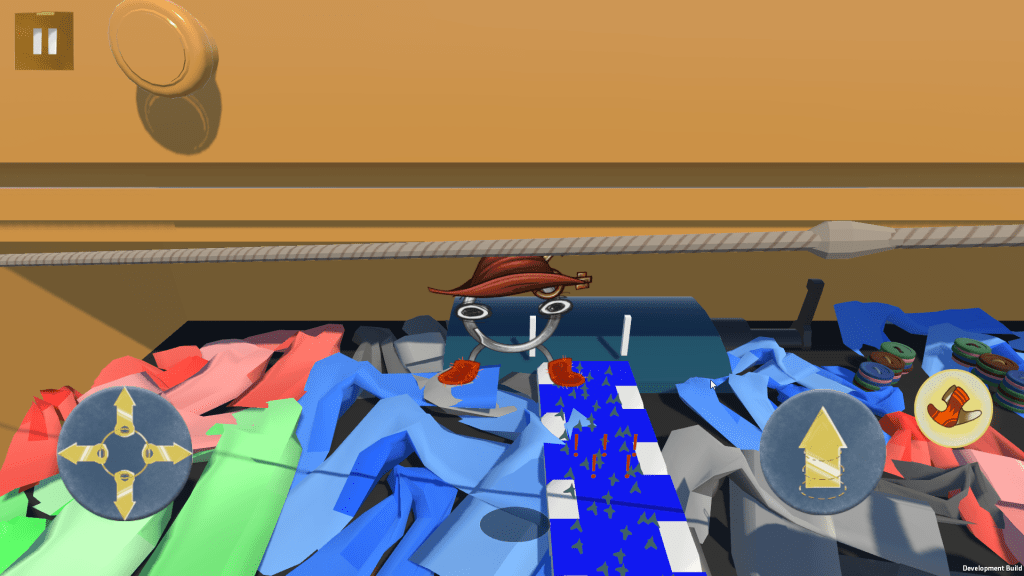
Safe Walking
public class SafeWalk_Code : MonoBehaviour

    void Update()
    {
        RegularLegs.SetActive(SafeWalk == false);
        SlowLegs.SetActive(SafeWalk);
        Button.SetActive(SlowCodeWork);

        if(SlowCodeWork == true)
        {
            if (Input.GetKeyDown(KeyCode.LeftShift))
            {
                WalkToggle = !(WalkToggle);
            }
            //If the player holds shift they will be able to move over dangourous areas.
            if (WalkToggle == true && Item == false)
            {
                SafeWalk = true;
                PM.movespeed = Slowspeed;
                PM.SlowJump = true;
            }
            else if (WalkToggle == false && Item == false)
            {
                SafeWalk = false;
                PM.movespeed = Maxspeed;
                PM.SlowJump = false;
            }
        }


    }

    private void OnCollisionEnter(Collision collision)
    {
        if(collision.gameObject.tag == "Damage" && SafeWalk != true)
        {
            if(PU.PickedItem != null)
            {
                PU.Damaged = true;
            }
            if (HurtBool == false)
            {
                StartCoroutine(HurtWait());
            }
        }
    }
The Safe Walk script is also the script which manages the damage system in the game. If the player is not safe walking, then they will be hurt when touching any gameobject with the Damage tag, causing them to be sent back to the previous checkpoint and for any items they are carrying with them to be reset. However, if the player turns on their safe walk (by pressing shift to toggle it on and off by changing the value of the WalkToggle bool) then they gain the ablility to walk over any damaging areas, with the SafeWalk bool being set to true. When the WalkToggle bool is true then the SafeWalk bool is set to true, and the player’s movement speed is halfed with them also losing the ability to jump, with the opposite being true when WalkToggle is set to false. The safe walk mechanic was genuinely this simple when coded, but it doesn’t undermine the thought and care that went into creating the ability, and whilst the player is safe from damaging areas, they aren’t safe from any obstacles blocking the path whilst Safe Walking.
public class SafeWalk_Code : MonoBehaviour

    public IEnumerator HurtWait()
    {
            HurtBool = true;
            PM.jump = true;
            Sprites.SetActive(false);
            Hurt.SetActive(true);
            PM.SlowJump = true;
            PM.StopMovement = true;
            yield return new WaitForSeconds(0.5f);
            Sprites.SetActive(true);
            Hurt.SetActive(false);
            PM.SlowJump = false;
            PM.StopMovement = false;
            WalkToggle = false;
            HurtBool = false;
            PU.Damaged = false;
            transform.position = Spawn;

    }
Since the game’s damage system is housed in the same script as the slow walk I felt it important to show how that system works. When first colliding with a damage area, the function HurtWait() is triggered. In this function the player’s sprite changes to their damaged look, and the player is forced to jump into the air, giving the effect of them being hurt similar to mario when he falls in lava. During this time the player is unable to move, then, after a few seconds they get repositioned to their previous checkpoint and respawn there, and can then continue the game. This death system is simple, quick and charming, with it being very cute seeing the player burst into the air after getting hit.
Fire
public class Fire_Code : MonoBehaviour
{
    void Update()
    {
        //checks what direction the player is and sets the fire to point that way
        FireLeft.SetActive(PM.moveValuesKeys.x < 0 || PM.moveValuesUI.x < 0);
        FireRight.SetActive(PM.moveValuesKeys.x > 0 || PM.moveValuesUI.x > 0);

        if(FireWork == true)
        {

            Button.SetActive(true);
            //Sets the fires on when holding the right click
            if (Input.GetKeyDown(KeyCode.Mouse1))
            {
                Fire();
            }
            else if (Input.GetKeyUp(KeyCode.Mouse1))
            {
                FireUp();
            }
        }
    }

    public void Fire()
    {
        Fires.SetActive(true);
    }

    public void FireUp()
    {
        Fires.SetActive(false);
    }
}
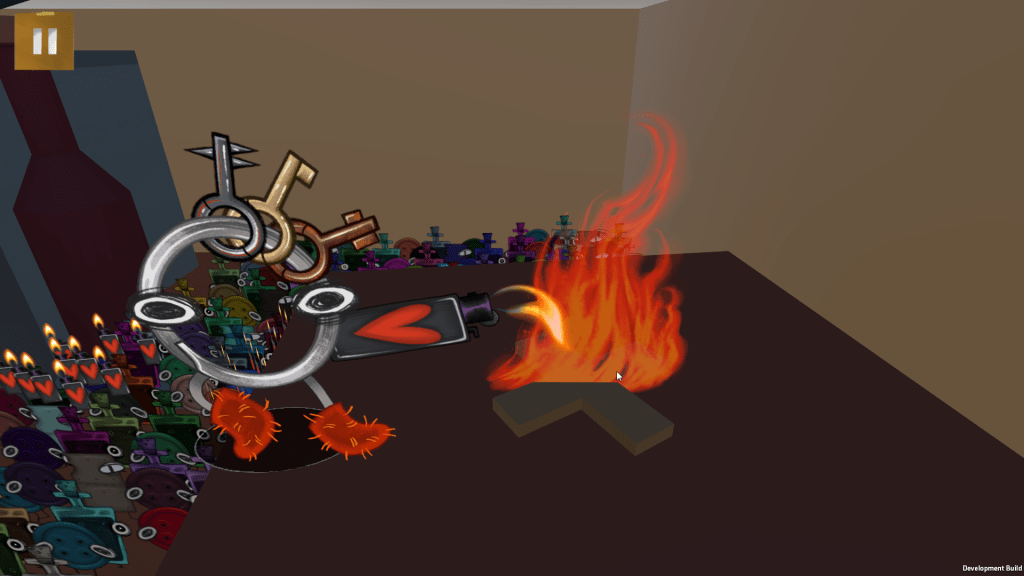
The final of the three mechanics, that of the fire ability, was quite simple. The actual ability is programmed within the Fire_Code script, where the script waits for the player to hold down the left click of the mouse. When the left click is held down then the Fire() function is called, which activates the flames. Once the player lets go of the left click then the FireUp() function is called which deactivates the flames. These flames are also programmed to be positioned on whichever side the player is moving, so that if the player is moving left then the flames are on there left, and vice versa on the right. The actual Fire_Code script is this simple, however the flame ability is more intricite for how it affects different items.
public class Fire : MonoBehaviour

    private void OnTriggerEnter(Collider other)
    {
        if(other.gameObject.tag == "Wood")
        {
            Destroy(other.gameObject);
            Debug.Log("FWorking");
        }
        else if(other.gameObject.tag == "Bonfire")
        {
            other.GetComponent<Bonfire>().OnFire = true;
        }
        else if(other.gameObject.tag == "FinalWood")
        {
            other.GetComponent<Bonfire>().OnFire = true;
            EC.C = GameObject.FindGameObjectWithTag("MainCamera");
            EC.FinalFire();
        }
    }

public class Bonfire : MonoBehaviour

    private void OnTriggerStay(Collider other)
    {
        if (OnFire == true)
        {
            if(other.gameObject.tag == "Player")
            {
                PM.Myrigidbody.AddForce(Vector3.up * UpSpeed, ForceMode.Acceleration);
            }
        }
    }
The flames which are activated in the Fire_Code script, have a script of there own. This script, named Fire, is used to track what the flames are colliding with, and what the flame should do to those things when touched. This is all done in the OnTriggerEnter of the Fire script, which checks what tag the object has. If the triggered object has the tag “Wood”, then the object will be destroyed, as fire burns wood. If the objects tag is “Bonfire” then it accesses that objects Bonfire script, lighting the bonfire. When the bonfire is lit and the player walks into it, then the player gets pushed up by an updraft, allowing them to reach higher locations. The final element the flame can interact with is the tag “FinalWood” which lights the triggered objects bonfire, before triggering the game’s final cutscene.
Miscelanious Scripts
Outside of the player’s movement and mechanics there are a handful of different elements of the game which I programmed and am proud of. This is how I programmed the camera to move during cutscenes, and how I programmed the NPCs to be able to give you tasks, both of which used creative solutions when programming them within the game.
Giving Requests
public class Request_Asking : MonoBehaviour

    private void OnTriggerEnter(Collider other)
    {
        Debug.SetActive(true);
        if (other.gameObject.tag == "Player")
        {
                SpawnDialogue();

        }
    }

    private void SpawnDialogue()
    {
        //Changes the dialogue to the post task dialogue if the task has been completed.
        if(Task == true)
        {
            RequestNumber = 2;
        }

        //Triggers the dialogue
        GameObject.FindGameObjectWithTag("CBlock").GetComponent<Dialogue_Manager>().StartDialogue(Say[RequestNumber]);

        //Increases the request number if its the first dialogue
        if(RequestNumber == 0)
        {
            RequestNumber = 1;
        }

        if(RequestNumber == 2)
        {
            gameObject.SetActive(false);
            Remove = true;
            if(KeyRequest == true)
            {
                SmallKey = true;
            }
        }
    }
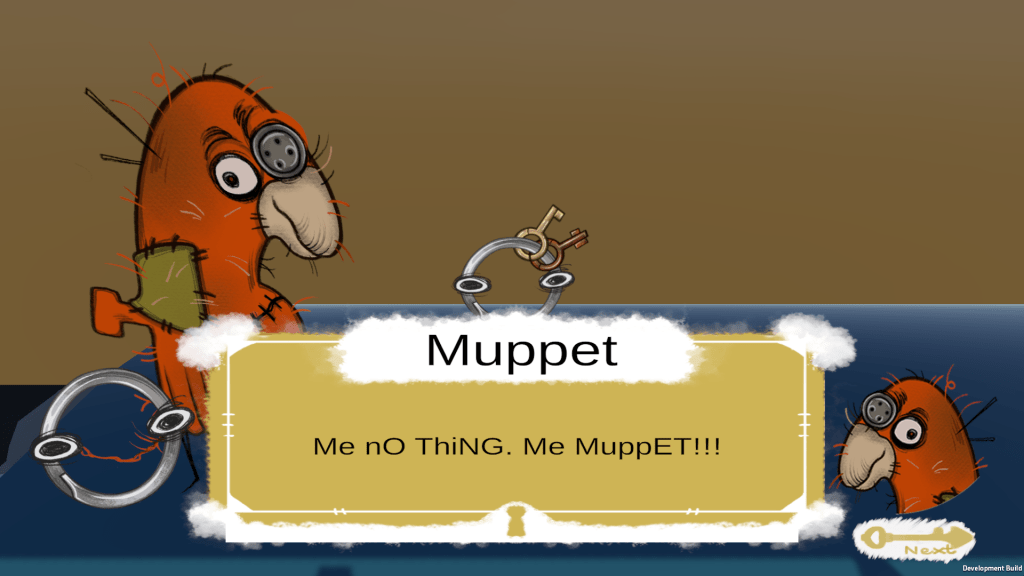
When entering the trigger of an NPC, they will begin talking to you. What they say is dependent on how far you are with there task. This is done using the script Request_Asking, where the current status of the request is stored in a int named RequestNumber. When entering the NPC’s trigger the SpawnDialogue() function is called, which checks the value of the RequestNumber bool and starts the appropriate line of dialogue based on this. When first interacting with the NPC, before you have completed their task, the value of RequestNumber will be set to 0, and therefore the first piece of dialogue will proceed to be played, after which the value of RequestNumber is set to 1, which represents the point in an NPC’s task where whenever talking to them they quickly remind you on what you need to do. Once the task is completed the value of RequestNumber is set to 2, representing how the task is complete, which then starts the final line of dialogue the NPC has and adds the NPC to your party, making it so you can no longer talk to the NPC.
public class GiveRequest : MonoBehaviour

  void Update()
    {
        if(Collided == true)
        {
            RA.Task = true;
        }
    }

    private void OnTriggerEnter(Collider other)
    {

        if(other.gameObject.tag == "Player")
        {
            if (P.PickedItem != null)
            {
                Debug.SetActive(true);
                if (P.PickedItem.tag == Item)
                {
                    P.PickedItem.transform.SetParent(gameObject.transform);
                    P.PickedItem.GetComponent<Item>().AddItem = false;
                    P.PickedItem.transform.localPosition = new Vector3(0, -1.15f, 0);
                    P.PickedItem = null;
                    SWC.Item = false;
                    PM.movespeed = SWC.Maxspeed;
                    PM.StopJump = false;
                    Collided = true;
                }
            }
        }
    }
Within the game there are several ways to complete a taks, though one of the ways that I am most proud of is when you give the NPC an item they want. This is done using a different Trigger with the GiveRequest script attatched. This script, when entering the trigger checks if the player has picked up an item. If they have, and this item has the same tag as the name stored in the Item string, then the task is completed and the item is placed next to the NPC. This is very simple, but is very versitile, allowing for multiple items to be within the game at once without the code getting confused.
Cutscene Camera
public class EventsCode : MonoBehaviour

    void Update()
    {
        var Move = speed * Time.deltaTime;

        float singleStep = speed * Time.deltaTime;

        #region Events
        if (C != null)
        {
            if(Event == true)
            {
                if (MoveCameraFar[Arraynumber] == true)
                {

                    C.transform.position = Vector3.MoveTowards(C.transform.position,
                    CameraMove[Arraynumber].transform.position, Move * speedmodifier);
                }
                else if (MoveCameraRegular[Arraynumber] == true)
                {
                    C.transform.localPosition = Vector3.MoveTowards(C.transform.localPosition, PlayerPosition, Move *
                    speedmodifier);
                }

                if (C.transform.position == CameraMove[Arraynumber].transform.position)
                {
                    switch(Arraynumber)
                    {
                        case 0:
                            {
                                StartCoroutine(DrawerOneEvent());
                            }
                            break;
                }
                else if (C.transform.localPosition == PlayerPosition && MoveCameraRegular[Arraynumber] == true)
                {
                    MoveCameraRegular[Arraynumber] = false;
                    PM.StopJump = false;
                    PM.StopMovement = false;
                    C.transform.localPosition = PlayerPosition;
                    Event = false;
                    C = null;
                    PauseMenu[0].SetActive(true);
                    speedmodifier = 1f;
                    Arraynumber = 9;
                    CO.Open = true;
                }
            }

        }
Within cutscenes of the game you will often see the camera move around to focus on the different events taking place. Typically, developers would use Cinemachine, a camera add-on to manage the camera within these events, however, this project was compeleted before I knew what Cinemachine was, so as such, I needed to find a clever way to achieve this effect with the game’s regular camera. I did this by having several arrays storing information to do with the camera. These arrays were: MoveCameraFar[], a bool array which when set true starts the event of the camera moving towards a location away from the player; MoveCameraRegular[], a bool array which is the inverse of MoveCameraFar[] as when it is set to true, the camera is set to move towards the player; CameraMove[], the final array for this calculation stores different GameObjects that the camera is meant to move towards. Each of these arrays are needed to calculate the movement of the camera, with the array element that is being called being based on the value of the ArrayNumber float, with each number responding to a different event function and array element that is used in the Update() function.
When the Event bool is true in the Update() function, then that means the camera needs to move across the scene, this starts by checking the values of MoveCameraFar[] and MoveCameraRegular[]. Since MoveCameraFar[] is always the first to be called in a cutscene, that value is checked first, which when true, uses the Vector3.MoveTowards function to move the camera towards the current gameobject called in the CameraMove[]. Inversly, when MoveCameraRegular[] is called whilst MoveCameraFar[] is false, the Vector3.MoveTowards function is used to move the camera back towards the player. After these intitial if statements, the Update() function checks to see whether the position of the camera has reached the value of the CameraMove[]’s location, which if is true, then calls the event of the cutscene that is taking place, based on a switch statement that checks the value of ArrayNumber. Once that function is complete, then the value of MoveCameraFar[] is set to false and the value of MoveCameraRegular[] is set to true, initiating the move back to the player. Once the camera is locked in it’s regular position after a cutscene the Update() function completes the cutscene and sets the Event bool to false until it is next needed.
